READY TO RIG V2.0
I've used these guides as base and saw Ready to Rig stuffy. https://forums.alliedmods.net/showpo...1227?p=2541227 https://forums.alliedmods.net/showpo...5827?p=2315827
It's very cool and saves a lot of time, but one problem is some bones are not included, or even rig is broken, example is spy head, Ready to Rig of WakaFlocka haves awful bug with spy head, that's why i'm releasing Ready to Rig V2.0, which includes all bones.
But i also recommend you to use Ready to Rig v1.0 if you are a beginner because in Ready to Rig V2.0 there are all bones, even one that you don't need, and cause of that it can be a problem to you. You can find it here.https://www.dropbox.com/s/9z56645hha...20Rig.zip?dl=1
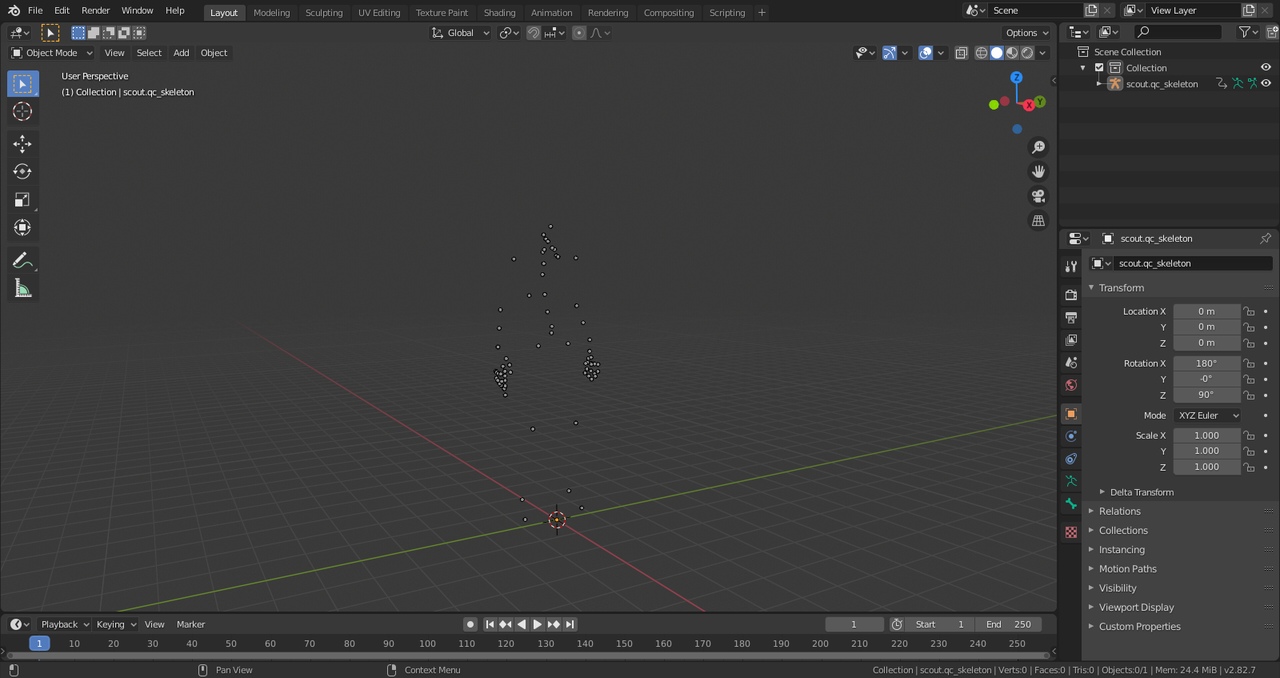
As soon as you open the blender, you will see something similar
Now, we need to install Blender Source Tools, to do this, click Edit>Preferences>Add-ons>Install... and select our downloaded archive
It is also desirable to click A to select all, and then click DELETE
Import of Model
Spoiler
To import our model into the blender, you must first open yourclass_Bones.blend from the archive Ready to Rig v2. 0, which is attached to this guide at the very beginning, in my case it will be the bones of the Scout
Once you did it, your blender window will look like THIS
How to get model that i want to rig?
Spoiler
You have 3 ways to-do this, first one is to download it from Garrys Mod/Source Filmmaker workshop, second is to download it from any site that contains model[But you will need some skills], and third one is to make it yourself[A lot of skill required].
To-do this, we need our Crowbar tool that we downloaded before, open it up and you will see menu. Now we have to setup our Crowbar tool to get it working with TF2.
To-do this, you have to go in "Set Up Games" tab and write path to your TF2 directory and choose what Crowbar wants to.
After, go in Decompile tab and you will see a lot of settings, just left them how they are by default.
Now we are ready to go, click browse at this bar And search for your model that you downloaded and choose .mdl file
After that, you have to setup "Output" folder You can select any folder, but i would recommend you to create folder named "Decompiled"
Once you did it, press "Decompile" button
Now in folder that we decompiled our model contains .smd file, now we have to get back to the blender and import it, to-do so, press File>Import>Source Engine and choose our .smd
Preparing imported model
Spoiler
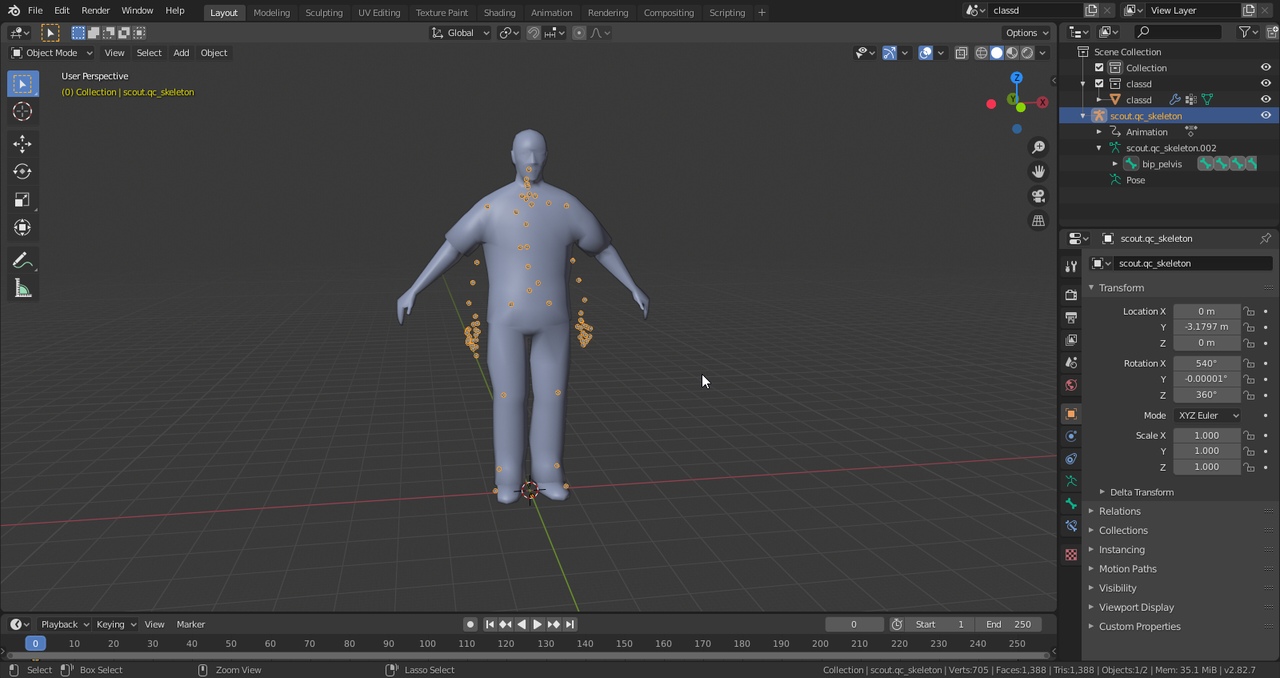
Now your blender screen will look something like THIS
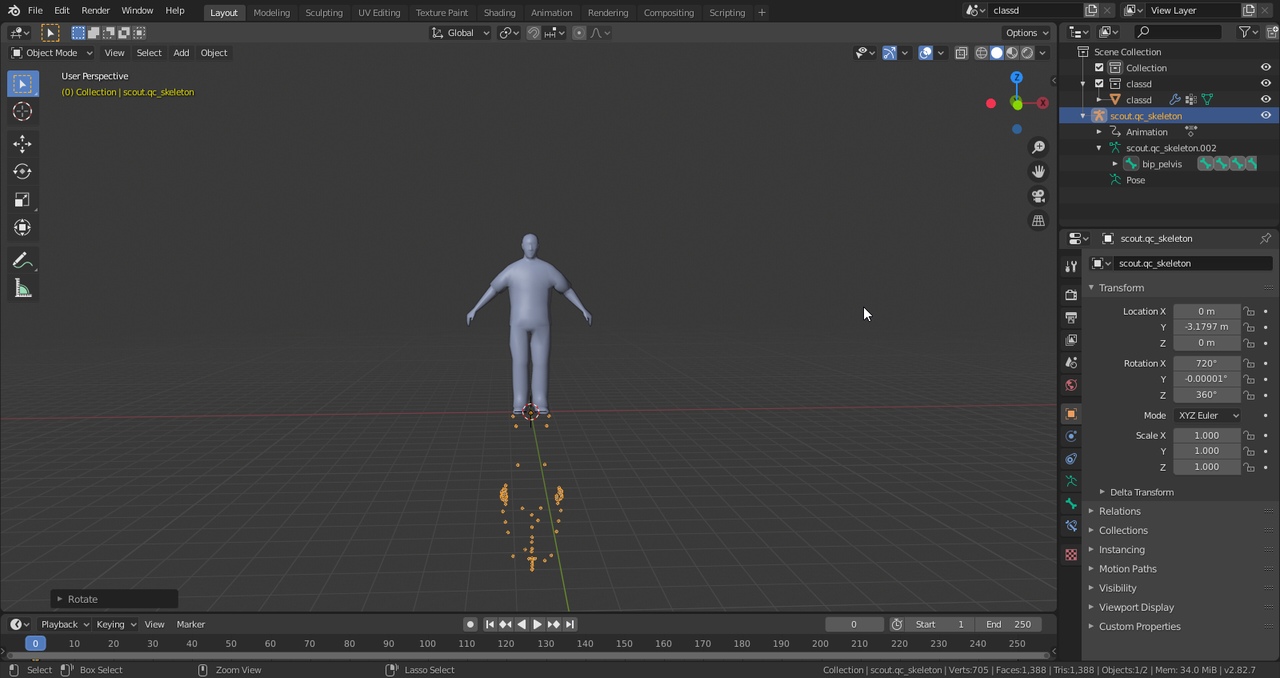
Now we have to rotate our model so it matches the bones that we imported earlier, you can do it by pressing R and then by pressing X Y Z buttons you will choose at what axis you will do rotate, in my case it will be Y. After you pressed R + Y, just type a value that you need, in my case it will be 180. And ta da our model is in right axis. Now we have to make it matching all of the axis, also if your model is too big, you can press G to increase/decrease it's size.
Starting to rig our model
Spoiler
WARNING
If your bones are changing their placement after going into Edit mode, rotate your bones oppositely how they were been, and after doing all manipulations and going out of edit mode, rotate them back
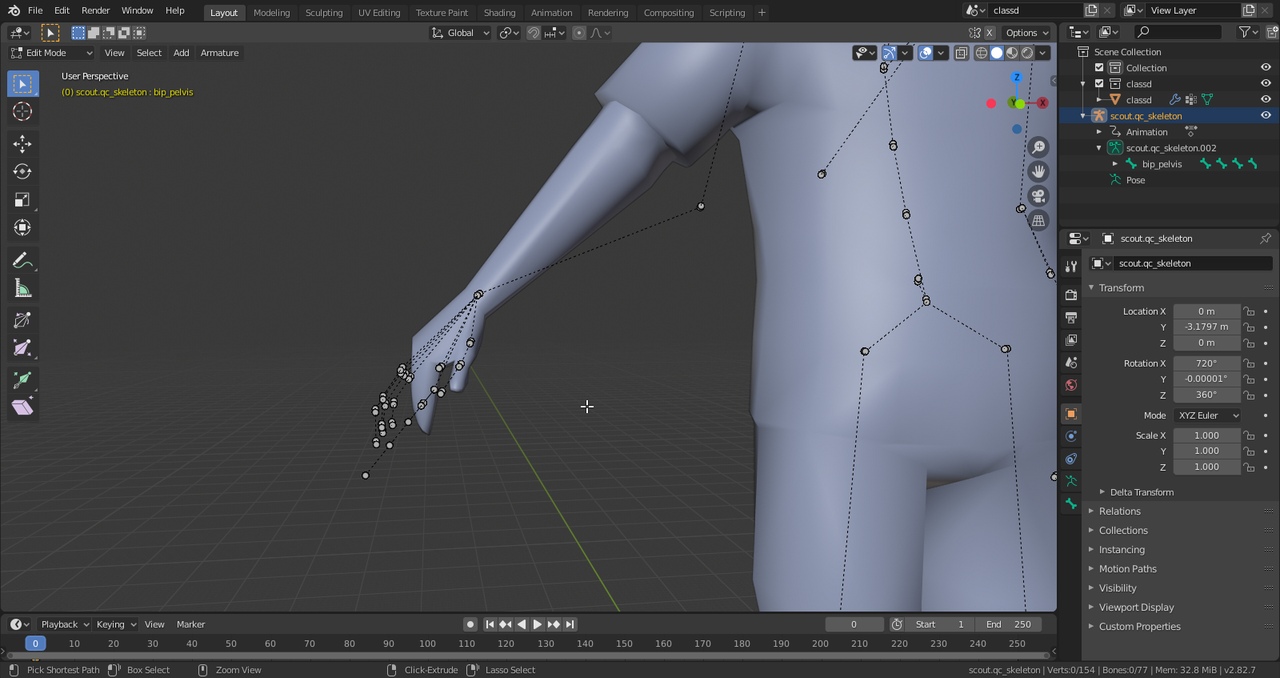
Now, we have to place all of our bones how they should in real life, i can't really explain this, you can look into it by watching some rigging time lapses.
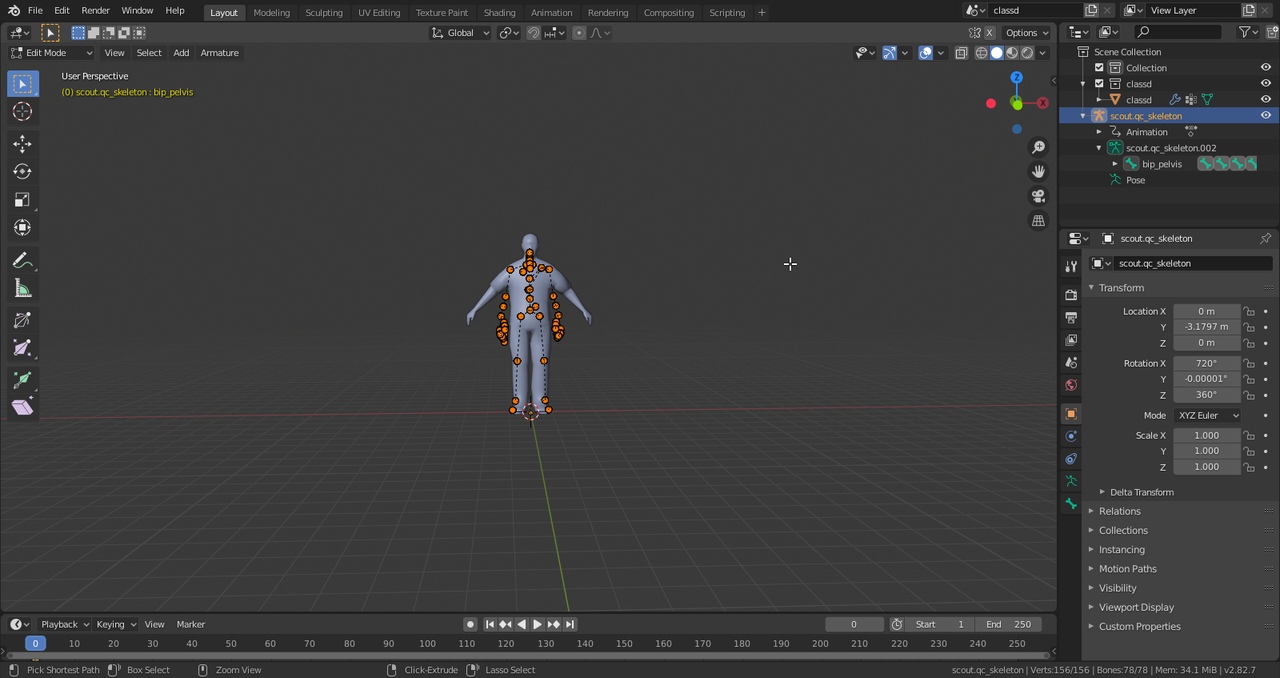
To-do so, you have to go in Edit mode and move your bones to "mesh" [Mesh = model]
Also you can delete bones if your model does not have some parts, for example, in my model there are no fingers, so i will just delete all finger bones
Once you placed all your bones, it should look like this
Rig of Model
Spoiler
Now the funniest part begins, to start rig our model and to attach weight to our mesh, we have to select Mesh, then Bones by holding CTRL, and press CTRL+P and choose With Automatic Weights
To see if model got rigged, you should select Bones and then Mesh by holding CTRL, and then going into Weight Paint mode
And then click on any bone while holding CTRL to see if there are some "Paint" on main mesh
I've got error bone heat weighting: failed to find solution for one or more bones
Spoiler
Now i want to talk about really annoying error, to send this error to hell and never get it, you should do next: Go into Edit Mode, select your mesh, press F3 and in the search find Separate and choose "Separate by Material", and then choose all the parts that got disconnected at the main, then select bones and do what i've described before to-do automatic weight paint and ta da, error is avoided.
But how i am able to return all of these parts into single one?
It's pretty easy, just select all of the parts and press J
Once you did all of the rig part, you can export model now, to-do this, we are gonna use BlenderSourceTools that we installed earlier.
Go into this tab
and you will see Source Engine Export tab, where Export Path is where your model will get exported, i recommend you to create folder named yourmodelname_model . And Engine Path is the path to the bin folder of Team Fortress 2. Also don't forget to click on SMD in Export Format tab
Once you did it, go into Ready to Rig v1 or v2 and copy all files from Ready To Rig/yourclass/decompiled 0.??/
Preparing .qc file
Spoiler
Open up class.qc
.qc is configurable file to choose what your model is.
First, we have to decide what model path will be, in my case, i will use freak_fortress_2/yourboss/yourboss.mdl
Now, we have to delete all of the garbage in .qc, it's including all of this down below
Now we have to change from this $model "scout" "scout_morphs_low.smd"
To this $model "scout" "NameOfSmdThatYouExportedFromBlender.smd"
Preparing .qc file part 3 + materials explanation
Spoiler
Now we have to setup materials, if you were used model from Garrys Mod/Source Filmmaker workshop, then it will be so easy because all materials were already done, you just have to copy $cdmaterials
line from .qc that you got by decompiling model from Garrys Mod/Source Filmmaker and remove old $cdmaterials line
If you are using not Garrys Mod/Source Filmmaker model, then you have to create textures by yourself, i will not teach you how-to do it but i will left guide over here that will do it for you
And then after you will finish, just copy path of your materials into $cdmaterials line and ta da you are ready to go
Compiling our model
Spoiler
To-do last touch, we have to open up our Crowbar tool and go into Compile tab, and you have to setup everything as you did with "Decompile", but instead of .mdl, we will choose .qc and instead of getting .qc, we will get our ready model.
And then press Compile
How-to look at my model?
Spoiler
To-do so, you should go into your Team Fortress 2/bin directory and choose hlmv.exe software
If you got something like that don't worry
To fix this, just go into your tf/ folder and copy gameinfo.txt, and then paste it into bin/ folder
Once we opened our HLMV, press File>Open>yourmodel.mdl And ta da, you are ready to go, if you got some issues with model, get back to blender and fix it by weight paint.


 Linear Mode

